
Kodi, one of the crucial common purposes for streaming IPTV channels is now out there to obtain for Xbox One on Xbox Reside. This is good news for Xbox One house owners, because the Kodi is an amazingly versatile and versatile software program for streaming IPTV channels. With its huge help for third-party add-ons that may rework the software program right into a DVR, enable it to stream from quite a few IPTV sources.
The way to setup IPTV on Xbox One
On this tutorial, we’re going to present you easy methods to carry IPTV channels to your Xbox One console utilizing Kodi.
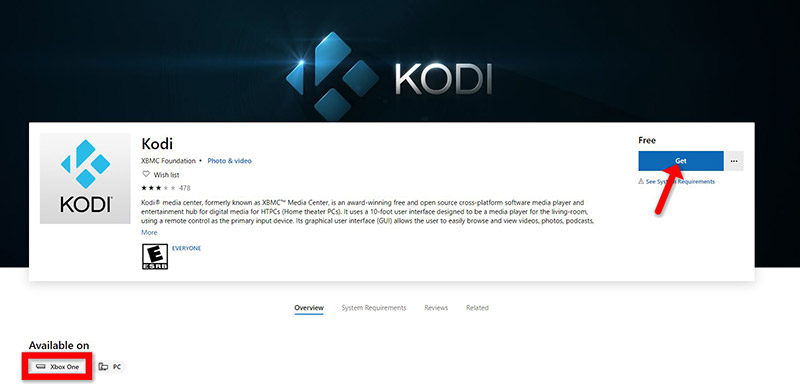
Step 1: Flip your Xbox One on and ensure it’s related to the web and that you simply’re logged in to your Xbox Reside account. Go to the “Xbox Reside retailer” and seek for “Kodi”. When you don’t see it there, the app could have been momentarily faraway from the Xbox Reside retailer. Now set up the app by clicking on “Get“.
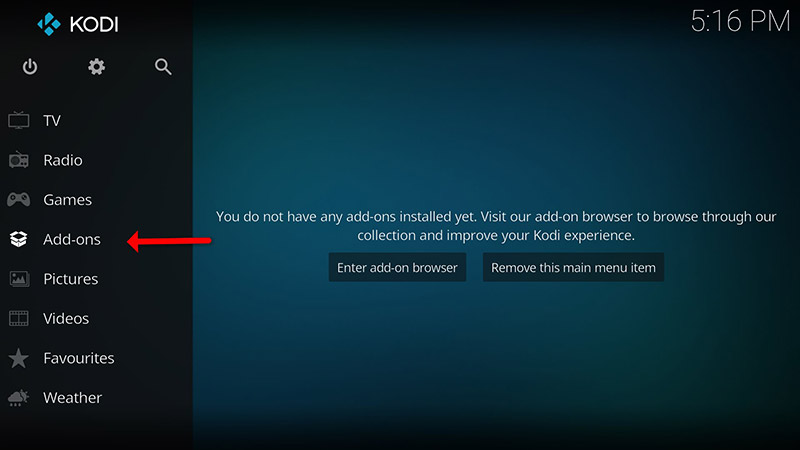
Step 2: When Kodi first hundreds up, it would seem fairly clean. It doesn’t comprise any add-ons or doesn’t show the movies you’ve got in your arduous drive. What we require are some add-ons.
Click on on “Add-ons“.
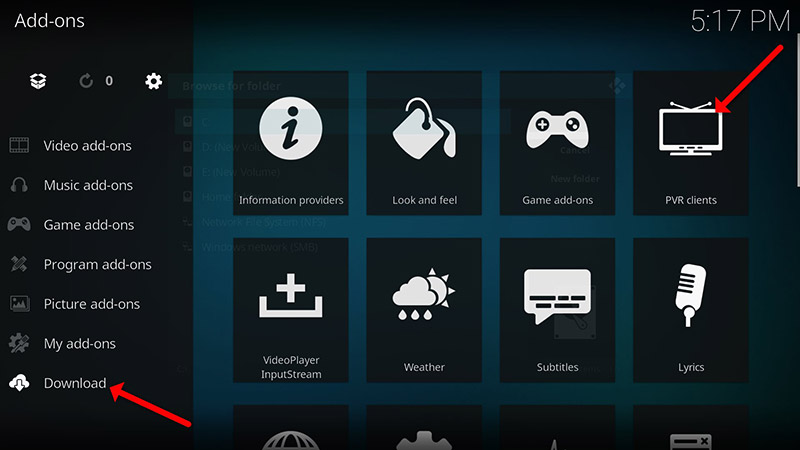
Step 3: Now click on on “Obtain” then choose “PVR purchasers“.
Word: We’re going to obtain and set up the PVR add-on right here, after putting in no have to go to the “Obtain“.
You will discover the put in add-ons “My add-ons“
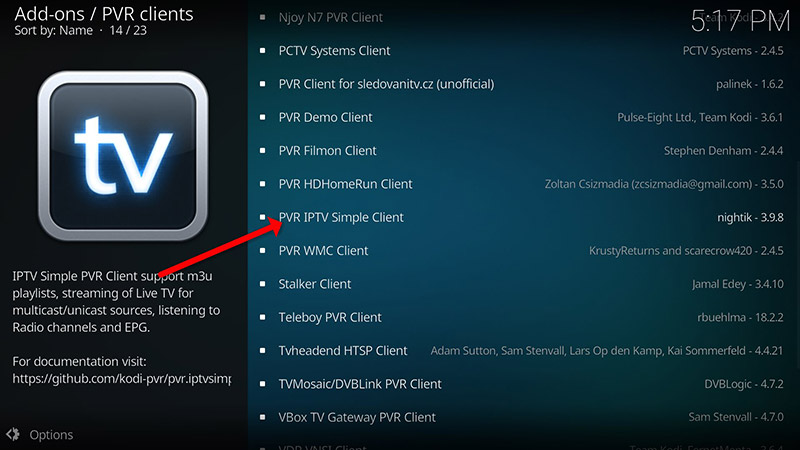
Step 4: Choose “PVR IPTV Easy Shopper“.
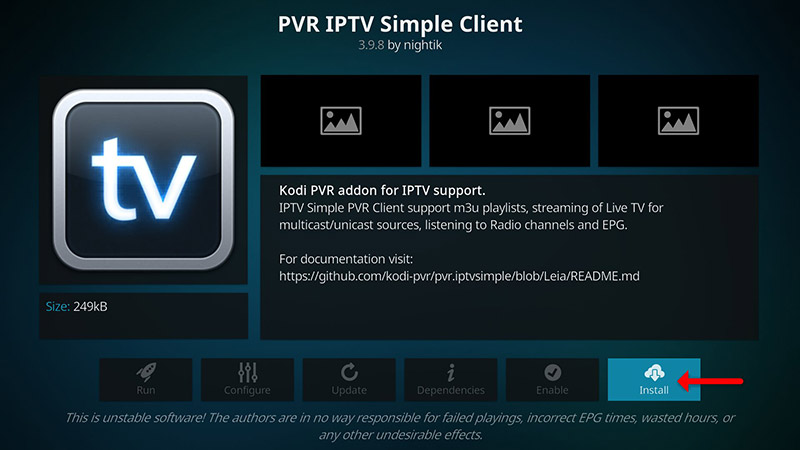
Step 5: Now click on on “Set up“.
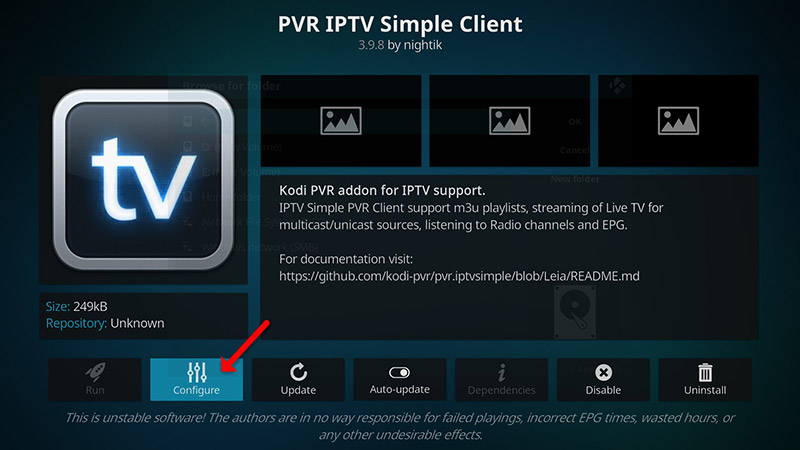
Step 6: After putting in “PVR IPTV Easy Shopper” head again to “My add-ons” then “PVR Shoppers” and run the add-on.
Now click on on “Configure“
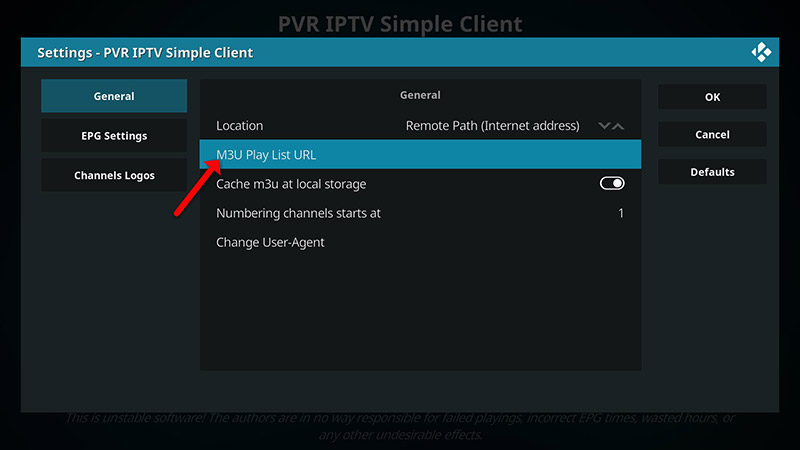
Step 7: Now choose “M3U Play Listing URL“.
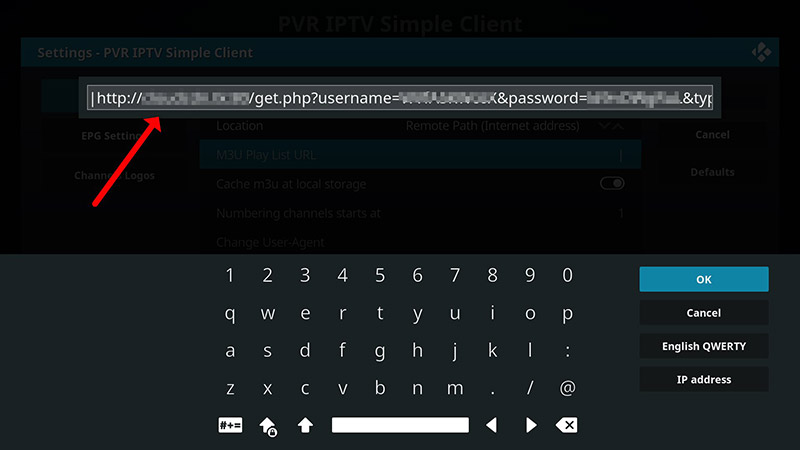
Step 8: Enter the M3U URL supplied by your IPTV distributor and click on “OK“.
Word: The progressive IPTV suppliers offer you a dashboard which you’ll be able to generate your M3U url in dashboard.
The way to add EPG
Step 9: Now go to “EPG Settings” and click on on “XMLTV URL” for EPG. What’s EPG?
You will get EPG url out of your IPTV supplier.
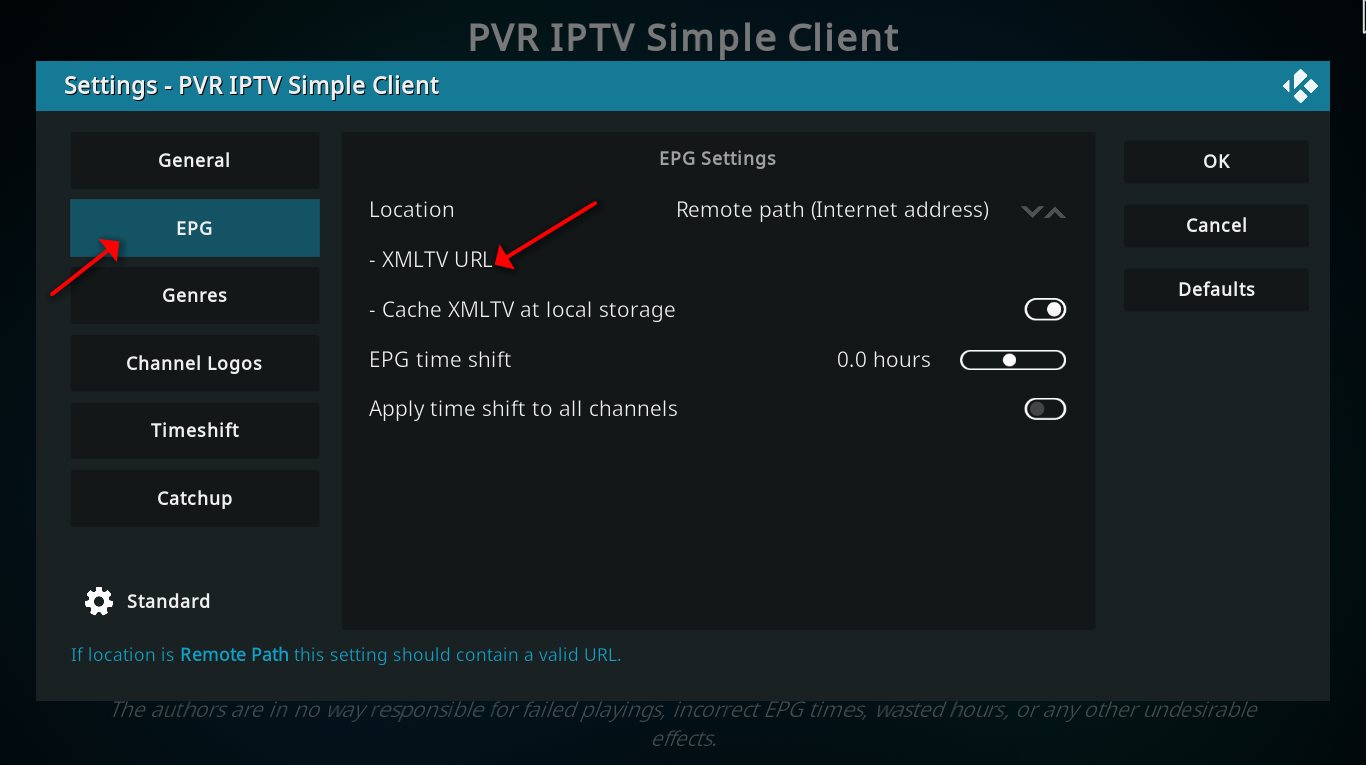
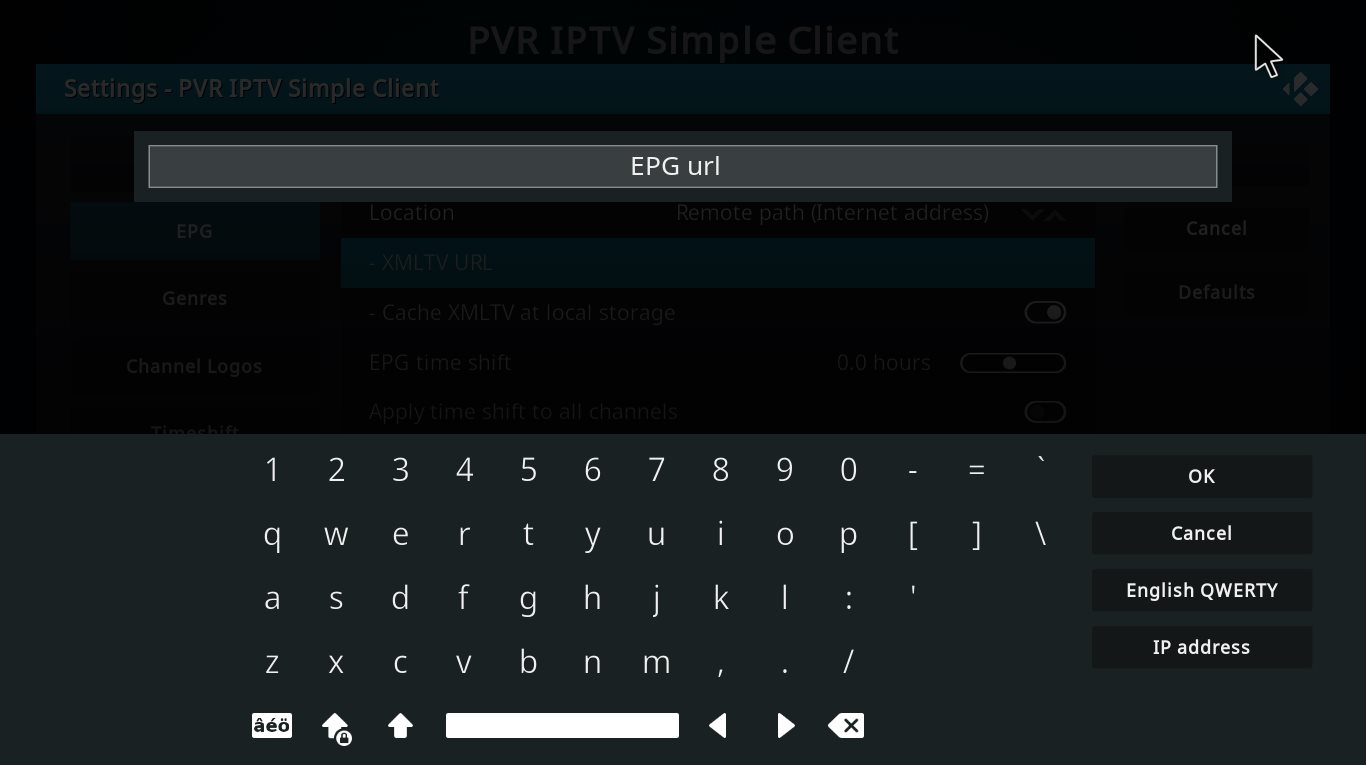
Step 10: Now paste your EPG URL and click on “OK“.
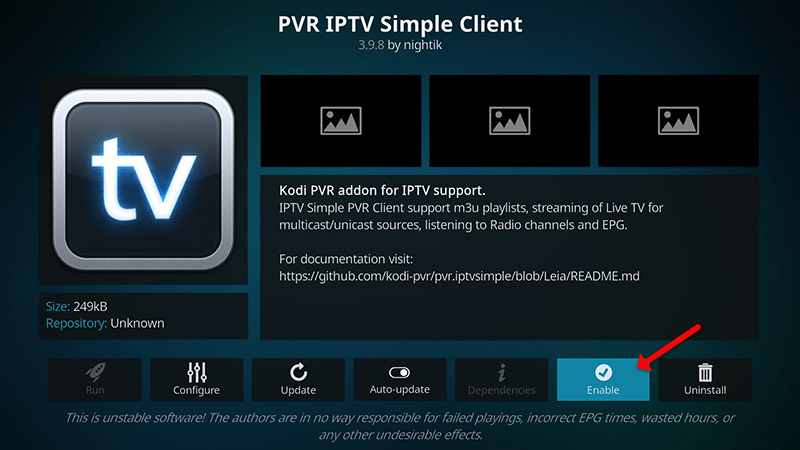
Step 11: Click on on “Allow“.
Word: After you allow the add-on you will notice “Disable”, this implies the add-on enabled so do NOT to click on on “Disable” once more.
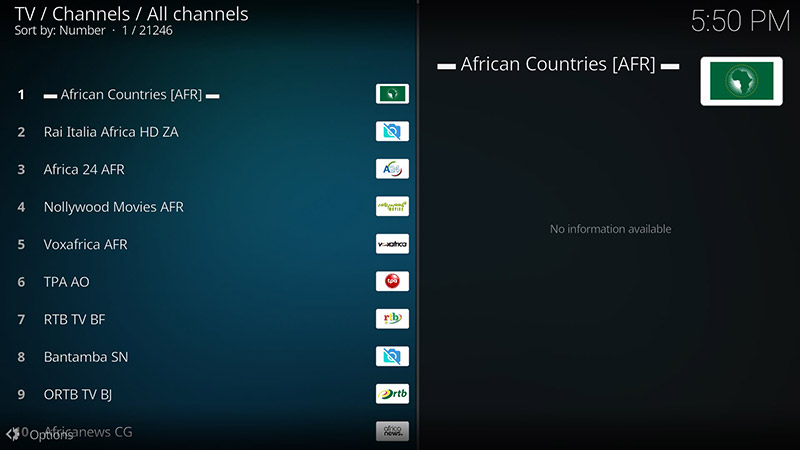
Step 12: Head again to “TV” and click on on “Channels“.
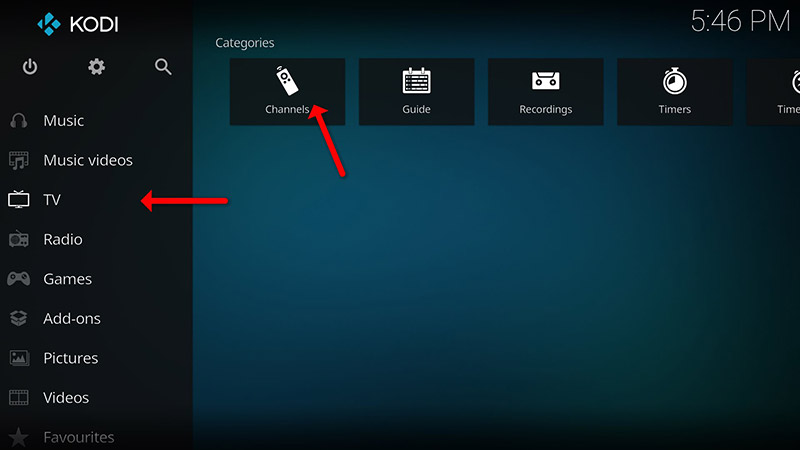
Step 13: Wait till you see the notification about updating channels and the set up course of is over.
Properly achieved, you’ve got IPTV channels now.
Please don’t hesitate to ask your query within the feedback in case you want any additional assist.
Developed by IPTV4U